Introduction to Orienteering
Lesson 1: Features of an Orienteering Map
By Anthony Scott, 2020
An orienteering map is specially prepared for use in orienteering competitions.
Symbols
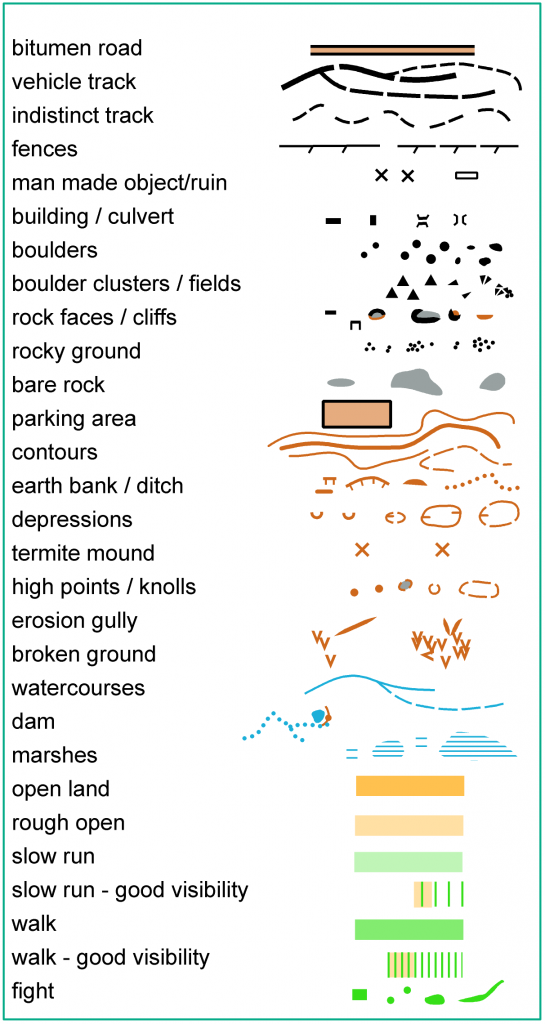
Orienteering maps use a range of symbols to represent the real world objects typically found in the forest. A description of these symbols is either displayed in the ‘legend’ on the map or is provided separately.
Many of the symbols are self explanatory and can be divided into broad categories based on colour.
Black is used for manmade objects such as tracks, fences, powerlines, and is also used for rock features such as boulders and cliffs.
Brown is used to depict land forms, in particular the contours, as well as pits, high points, erosion gullies and embankments.
Blue is used for water features such as rivers, watercourses, dams and marshes. (It is worth noting that in Australia many of the mapped watercourses do not have permanent water in them.)
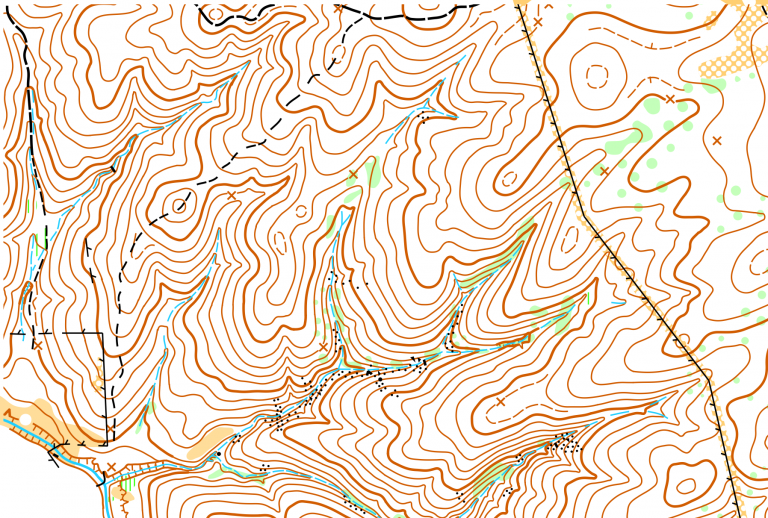
One peculiar feature about orienteering maps is that any forest which you can run through is shown as white (open forest); only denser bush or forest is shown as green. The darker the green, the more difficult it is to get through. Cleared areas
(no trees) appear as various shades of yellow.
A comprehensive list of orienteering symbols can be viewed here.
Contours
Contours are the brown (and often squiggly) lines on a map that connect points of equal elevation. In other words, contour lines describe the shape, or topography, of the land. Most orienteering maps use a contour interval (distance between each contour line) of 5 metres.
Map Scale
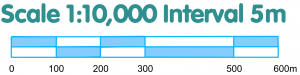
Map scale refers to the relationship (or ratio) between distance on a map and the corresponding distance on the ground. For example on a 1: 10,000 scale map 1 cm on the map represents 10,000 cm (or 100m) on the ground.
Magnetic North Lines
One feature of orienteering maps that is specific to the sport are the magnetic north lines (as opposed to ‘true north’ lines). This allows you to use your compass without making any adjustments between magnetic north and true north.
Courses
An orienteering course is marked on a map with purple (or magenta) shapes and lines. The start is a triangle, the controls are in the exact centre of circles (which are also numbered), and the finish is two concentric circles. Competitors must complete the course in a prescribed order by
visiting control number 1, then 2, then 3, and so on. Control circles are connected by lines to help you see where to go to next. However, you do not need to travel on the line; you choose your own route.

Control Descriptions
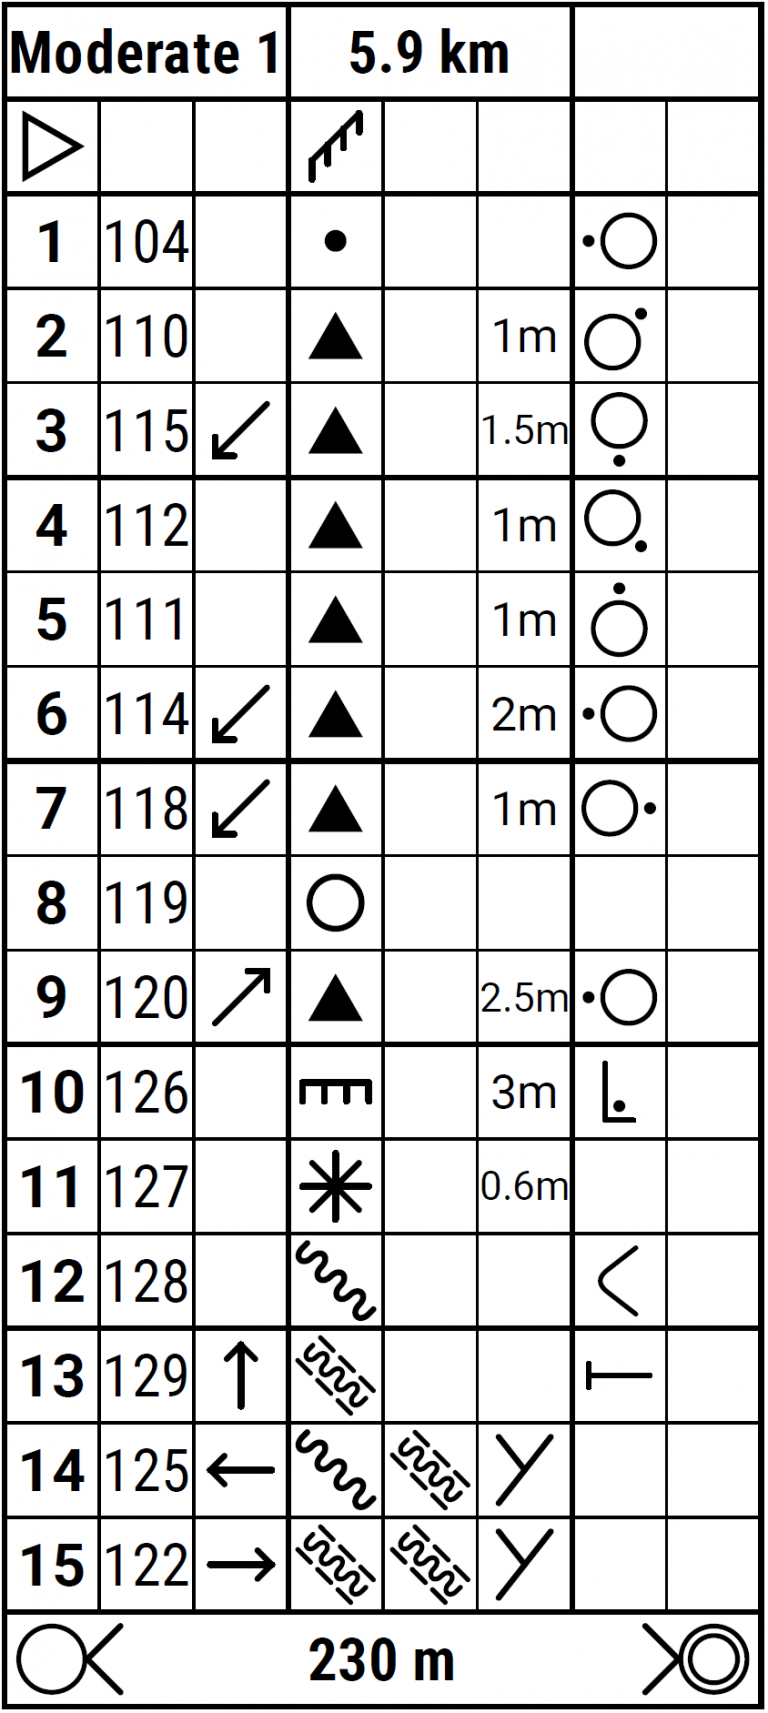
Control descriptions provide valuable information about each control that will help you navigate to the exact location of the control flag and also confirm that it is the correct site. The descriptions will be printed on the map or on a separate piece of paper that is provided before you start. Control descriptions can either be in English or ‘International Symbols’.
If International Symbols are used (such as the example shown here), the first column denotes what order you must find the controls in, and the very important second column denotes the number that you will find on the actual control. So, if you see “2, 110” that is the second control you must find and you will see the number 110 on the control when you find it. If the number in the second column does not match the number on control you’ve found, then you’ve found the wrong control.
The next 5 columns describe the feature that the control is on, including which side and the height of the feature. Using the example shown above, control 2 is on a boulder,1 metre high, and is located on the north-east side. A one page summary of control symbols is generally available at events or can be found here.